The short answer
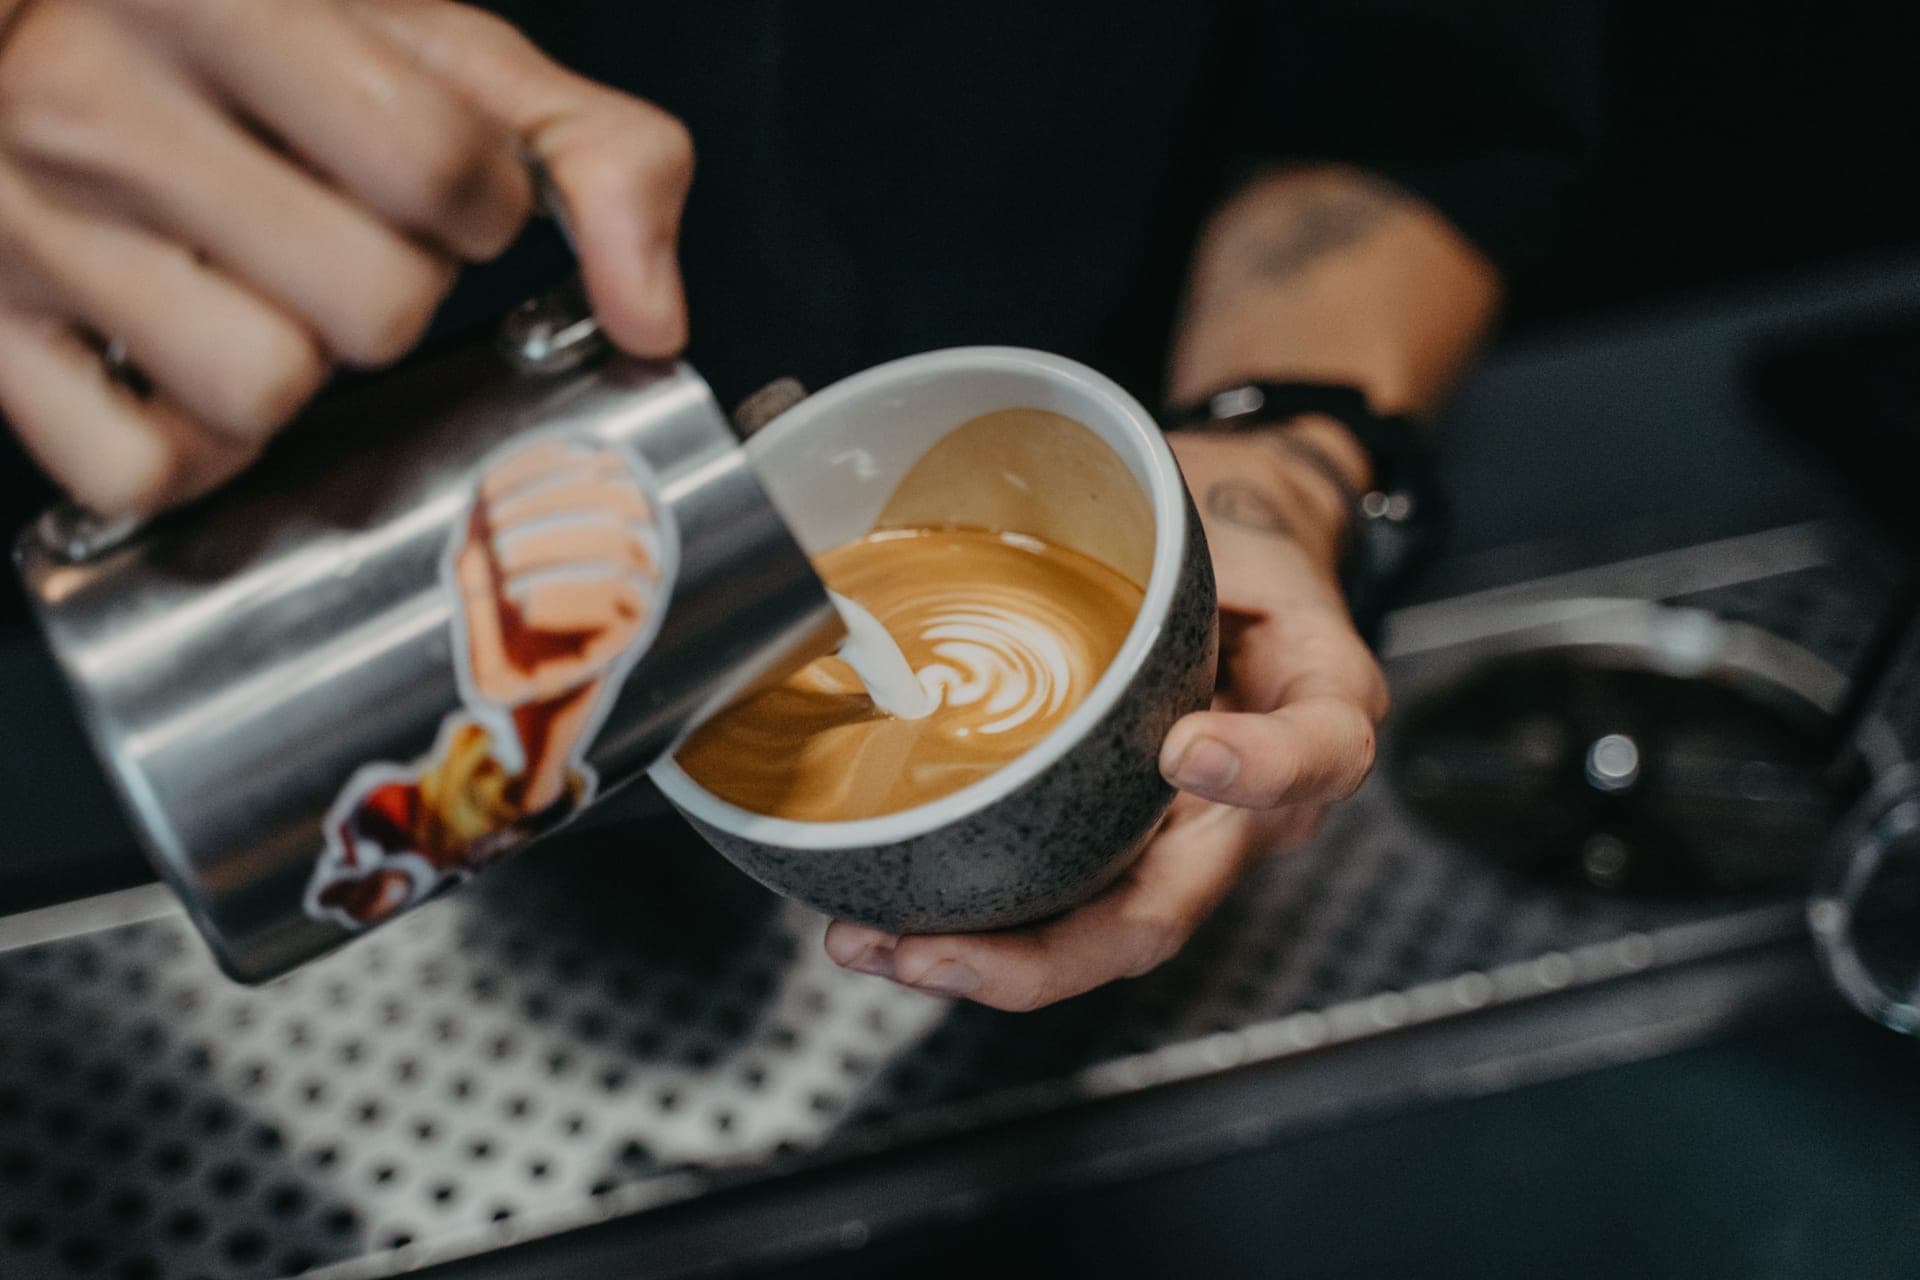
Steaming milk is two phases and one number. Stretch first - wand tip just under the surface, five to ten seconds of air - then drop the pitcher so the tip sits deeper and the milk spins into a vortex until the pitcher is almost too hot to hold. Breville puts the target at 140 to 145 F and warns that milk burns above 145; La Marzocco gives 130 to 140 F. Stop below your target, because the temperature keeps climbing after the steam stops.
What microfoam actually is
Microfoam is milk with air folded into it so finely that you cannot see individual bubbles. It pours as one liquid rather than as foam sitting on top of milk, and its surface looks glossy - Breville's own description is that after tapping and swirling, the foam and the steamed milk are fully combined and the surface appears glossy.
That is different from the stiff foam a whisk frother makes. Stiff foam separates: you get a dry cap on top and thin milk underneath, which is why it cannot be poured into a pattern and why it collapses in the cup.
Everything in the method below exists to get air into the milk early and then break it small.
The method
Step 1
Fill the pitcher about halfway
Breville says a half cup - about 4 ounces - or up to where the spout begins. La Marzocco puts it within a finger-width of the base of the spout, roughly halfway. Milk expands as you aerate it, so a full pitcher has nowhere to go.
Step 2
Purge the wand before you start
A short burst of steam clears condensation out of the wand. Skipping it means the first thing entering your milk is water, which thins it and makes the texture harder to build.
Step 3
Stretch: tip just below the surface, 5 to 10 seconds
Set the wand tip just under the milk's surface, angled toward one side of the pitcher, and open the steam. You want a steady tearing sound rather than a violent screech. Breville puts this phase at about 5 to 10 seconds, or until you have the amount of foam the drink needs - less for a latte, more for a cappuccino.
Step 4
Texture: sink the wand and make a vortex
Lower the pitcher so the tip sits deeper. The tearing sound should stop and the milk should start spinning in a whirlpool. That vortex is what shears the bubbles you just made down into microfoam, and it is doing the real work.
Step 5
Stop before your target temperature
Hold the pitcher and steam until it is almost too hot to keep your hand on it. Cut the steam below your target - residual heat carries the milk up several degrees after the wand stops. Over 145 F, Breville says, the milk is burnt.
Step 6
Purge and wipe the wand immediately
Wipe with a damp cloth and purge again. Milk dries inside and on a wand within minutes, and a crusted wand steams badly and is unpleasant to clean later.
Step 7
Groom: tap, then swirl
Tap the pitcher once or twice on the counter to burst any large bubbles, then swirl until the surface is glossy and moves as one liquid. If it separates while you swirl, the texturing phase was too short.
Step 8
Pour straight away
Textured milk starts separating within a minute. Pour it into the espresso while it is still spinning - do not put the pitcher down and come back to it.
The three mistakes that make foam instead of microfoam
Adding air too late. Air has to go in while the milk is still cool. Once milk is warm, the proteins that wrap around bubbles and hold them there have already started to set, so late air stays as big bubbles that never break down.
No vortex. If the wand stays near the surface for the whole steam you keep adding air and never shear it. The result is a stiff cap on thin milk. Sinking the tip until the milk spins is the entire second half of the method.
Going too hot. Past roughly 145 F the milk loses its sweetness and the texture goes flat and papery. This is the most common fault on home machines, because people hold the wand in until the pitcher is uncomfortable rather than almost uncomfortable.
Quick picks
The answer first. Tap any row to jump to the full reasoning for that pick.
| # | Product | Best for | Award | Price |
|---|---|---|---|---|
| 1 | 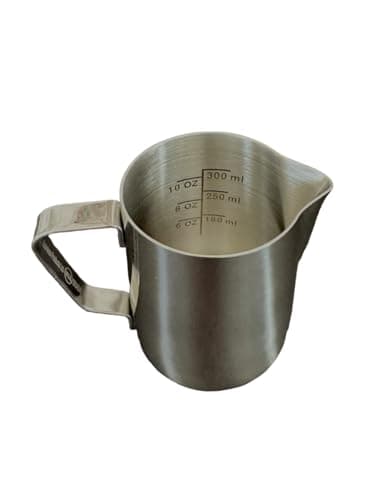 | Single cappuccinos, cortados and small lattes | The piece that makes it possible | |
| 2 | 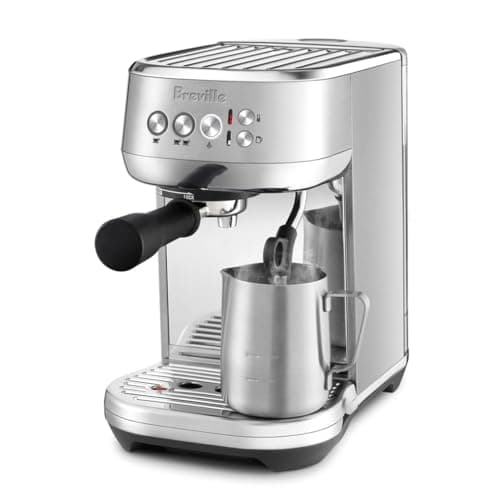 | A good cappuccino without the learning curve | If you want the machine to do it | |
| 3 | 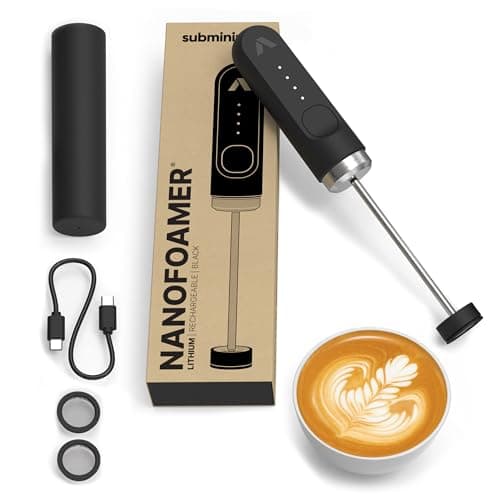 | Drip, pour-over or capsule drinkers who want real texture | Microfoam without a steam wand | |
| 4 | 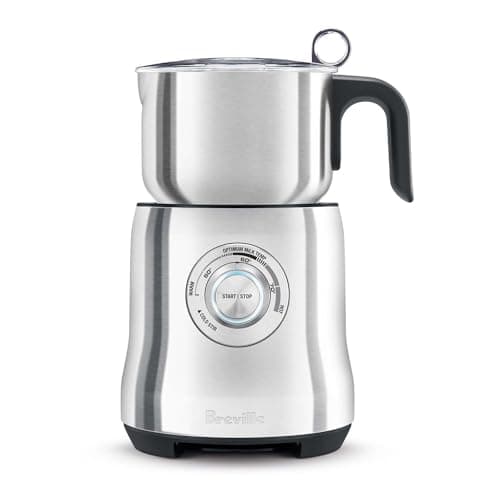 | Milk for three drinks without touching the espresso machine | If you want heat and foam in one appliance | |
| 5 | 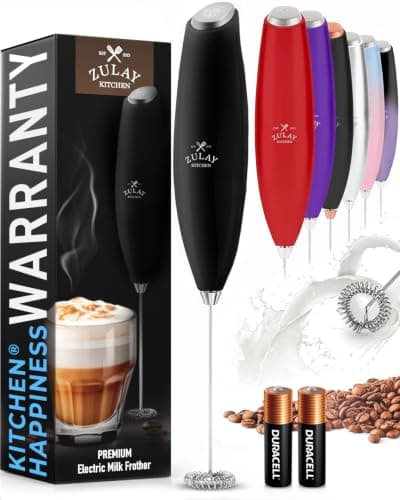 | Foam on a drip coffee for almost nothing | The cheapest foam there is |
1. The piece that makes it possible
Rattleware 12 oz Latte Art Pitcher
Entry tier · A 12 oz stainless steaming pitcher with a tapered spout, sized for single drinks.
A 12 oz tapered pitcher - the right size for one drink, which is most of the technique.
Pitcher size is not an accessory decision, it is part of the method. La Marzocco's own guidance puts 12 oz pitchers with drinks under 8 oz and 20 oz pitchers with 8 to 12 oz drinks or two at once.
Too large a pitcher and there is not enough milk for the wand to build a vortex; too small and it climbs over the rim as soon as you introduce air.
This one is 12 oz stainless with a tapered, drip-resistant spout. The taper is what turns a pour into a placed stream - the difference between milk landing where you aimed and milk landing everywhere.
Commercial-grade construction at a domestic price, and the stainless body is also your thermometer: you steam until it is almost too hot to hold.
It is too small for two drinks at once, it has no etched graduations at this size, and stainless conducts heat - which is the point, and also why it gets hot in the hand.
Specification
- Capacity
- 12 oz
- Material
- Stainless steel
- Spout
- Tapered, drip-resistant
- Suits
- Macchiato, cappuccino, small latte
What it does well
- Correct size for a single drink, which matters more than people expect
- Tapered spout is what makes a controlled pour possible
- Commercial-grade construction at a domestic price
Where it gives ground
- Too small for two drinks at once
- No etched graduations at this size
- Stainless conducts heat, so it gets hot in the hand
Skip it if
Skip it if you routinely make two lattes at once - the 20 oz size is the right tool for that.
2. If you want the machine to do it
Breville Bambino Plus
Entry tier · The Bambino with automatic milk texturing added.
Automatic texturing to a set temperature and foam level, in a 7.4-inch-wide body.
The Bambino Plus textures milk automatically to a temperature and foam level you select, using a 16 fl oz / 480 ml jug, and heats via ThermoJet in three seconds.
Automation removes the two things beginners get wrong - how long to aerate and when to stop - which is why it produces a usable microfoam on the first try.
It is a real 54 mm espresso machine underneath, with 15 bar pumped down to 9 bar at the puck and low-pressure pre-infusion, so the drink under the milk is proper espresso.
What it will not do is teach you. A machine that judges the milk for you removes the feedback loop that hand steaming trains.
There is no grinder, so budget for one - see best grinders for Breville espresso machines.
Specification
- Portafilter
- 54 mm stainless, 18 g dose
- Heating
- ThermoJet, ready in 3 seconds
- Pump
- 15 bar Italian pump, 9 bar extraction
- Milk
- Automatic texturing, 16 fl oz / 480 ml jug
- Footprint
- 11.9 x 7.4 x 14.3 in
What it does well
- Automatic milk texturing gets a usable microfoam without practice
- Same three-second heat-up as the standard Bambino
- Fits a narrow counter with a grinder beside it
Where it gives ground
- You are paying for the milk automation, not better espresso
- Still no grinder
- Auto-steam removes the control an enthusiast eventually wants
Skip it if
Skip it if latte art is the goal. Auto-texturing gives a fixed result rather than one you shape.
3. Microfoam without a steam wand
Subminimal NanoFoamer
Mid tier · A handheld frother that forces milk through a fine screen to build real microfoam.
An impeller that forces warm milk through a fine screen instead of whisking air into it.
Most handheld frothers whisk air in and produce stiff bubbles. The NanoFoamer drives milk through an interchangeable screen, which shears bubbles down rather than adding them - Subminimal describes it as producing the same liquid-velvet texture as a steam wand.
An impeller height adjuster moves in 0.4 mm steps and the screens come in several finenesses, so texture is something you set rather than something you accept.
It takes about 30 seconds from warm milk, and it works with plant milks, which stiff-foam frothers handle badly.
It does not heat: you warm the milk first, on the stove or in a microwave, then texture it. That is one more step and one more thing to get the temperature right on.
There are more parts to rinse than a plain whisk frother, and the best plant-milk results still need a barista-formulated carton.
Specification
- Mechanism
- Impeller driving milk through an interchangeable NanoScreen
- Adjustment
- Impeller height adjuster, 0.4 mm per click
- Screens
- Multiple fineness options
- Time
- About 30 seconds from warm milk
- Water resistance
- IPX-4; later models IPX-5
What it does well
- The only handheld device that produces genuine microfoam rather than bubbly foam
- Interchangeable screens let you set texture rather than accept one
- Works with plant milks, which stiff-foam frothers handle badly
Where it gives ground
- Does not heat the milk - you warm it separately first
- Best results still need barista-formulated plant milk
- More parts to rinse than a plain whisk frother
Skip it if
Skip it if your machine already has a decent steam wand. This solves a problem you do not have.
4. If you want heat and foam in one appliance
Breville Milk Cafe
Mid tier · A standalone induction milk frother with latte and cappuccino discs.
A standalone induction frother that heats to a chosen temperature and froths with a disc.
The Milk Cafe holds 24 fl oz - up to three drinks - and heats by 500 W induction with a temperature selection that runs from a cold stir up to 160 F.
Choosing a temperature is the useful part: most standalone frothers have one hot setting, and one hot setting is usually too hot.
It ships with latte and cappuccino discs, so the foam volume changes with the drink rather than with your timing.
On a single-boiler machine it removes the wait between brewing and steaming entirely, which is a real workflow gain.
Disc-frothed milk is not steam-textured milk - latte art is off the table - and it is another appliance on a counter you may not have space for.
Specification
- Capacity
- 24 fl oz, up to 3 cups
- Temperature
- Cold stir to hot, up to 160 F
- Discs
- Latte and cappuccino frothing discs
- Power
- 500 W, induction heating
- Size
- 7.5 x 6.4 x 10.4 in
What it does well
- Frees a single-boiler machine from switching between brew and steam
- Genuine temperature selection rather than one hot setting
- Makes three drinks worth of milk at once
Where it gives ground
- Disc-frothed milk is not steam-textured milk, and latte art is off the table
- Another appliance on the counter
- Pointless if your machine already steams well
Skip it if
Skip it if your machine steams well already. It duplicates a function you paid for.
5. The cheapest foam there is
Zulay Handheld Milk Frother
Budget tier · A battery-powered handheld whisk that aerates milk in a jug or mug.
A battery whisk that aerates milk in any vessel - bubbles, not microfoam.
A handheld whisk spins air into warm milk. It is the least expensive way to get foam onto a coffee, and it works in the mug you are already drinking from.
Cleaning is rinsing the whisk under hot water and switching it on, which is as low-friction as this category gets.
It runs on two AA batteries - included - with a metal stand, and rechargeable versions are sold.
It aerates but does not heat, so the milk has to be warmed first, and it makes bubbly foam rather than steam-textured microfoam.
Latte art is not possible with it. If that is the goal, the NanoFoamer or a steam wand is the honest answer - see milk frother vs steam wand.
Specification
- Power
- 2 AA batteries (included); rechargeable models also sold
- Whisk
- Stainless steel
- Body
- Nylon
- Accessories
- Metal stand included
What it does well
- The cheapest way to get foam on a coffee, by a wide margin
- Works in any vessel, including the mug you are drinking from
- Cleans by rinsing the whisk under hot water and switching it on
Where it gives ground
- Aerates but does not heat - you warm the milk separately
- Produces bubbly foam, not steam-textured microfoam
- Latte art is not possible with it
Skip it if
Skip it if you want glossy, pourable milk. This makes a foam cap, and it is honest about that.
What to use if your machine has no steam wand
Most coffee at home is made without one. The honest ranking is: a steam wand gives the best texture, the NanoFoamer gets genuinely close by shearing rather than whisking, a heated disc frother like the Milk Cafe gives warm foam with no art, and a handheld whisk gives a foam cap for the price of a sandwich.
All of them need the milk warmed to the same window, and none of them survive being taken past it. A cheap probe thermometer removes the guesswork if the pitcher-temperature trick does not suit you - see best milk frothers for the full category.
Milk choice changes what you can do
- Whole dairy milk is the easiest to texture: its fat and protein together hold microfoam without any help.
- Skim milk makes more foam and drier foam. It stretches easily, which is why it is easy to over-aerate.
- Barista-formulated oat milk is the plant milk that behaves most like dairy, because the formulation exists specifically to stabilize foam - see best milk frothers for oat milk.
- Standard plant milks will foam and then collapse quickly. Nothing in your technique fixes that; the carton is the variable.
How much foam each drink wants
Scroll the table sideways to see every column.
The variable is the stretch phase, not the texturing phase. Texture until the milk is glossy regardless of the drink - a cappuccino is not less textured than a latte, it simply has more air in it.