The short answer
Buy the Subminimal NanoFoamer if you want genuine microfoam and latte art from plant milk. Buy the Breville Milk Cafe if you want heating and texturing in one step. If your machine has a steam wand, buy a pitcher and change your technique instead.
Why oat milk foams differently
Dairy foam is built by casein and whey proteins, which unfold when agitated and form stable films around air bubbles. Fat and sugar contribute texture and sweetness, but the proteins are what make the foam hold together.
Oat milk has no casein at all. Its structure comes from oat proteins, added fats and, in barista formulations, stabilizers doing deliberately what casein does naturally. That is why the same device produces glossy microfoam from dairy and a collapsing head from oat milk.
Scroll the table sideways to see every column.
Quick picks
The answer first. Tap any row to jump to the full reasoning for that pick.
Prices shown are checked daily against the retailer, as of October 24, 2026. We never write a price into the text of a page.
| # | Product | Best for | Award | Price |
|---|---|---|---|---|
| 1 | 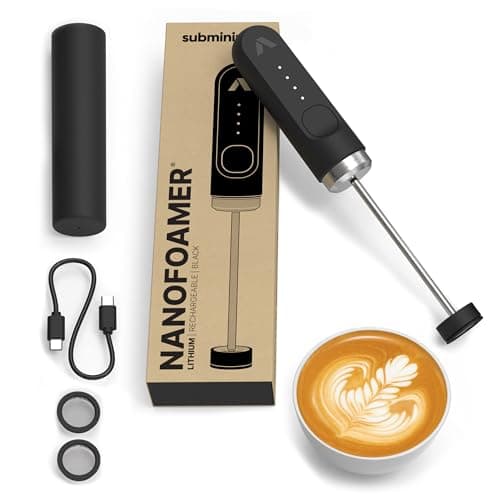 | Latte art and flat whites with plant milk | Top pick | |
| 2 | 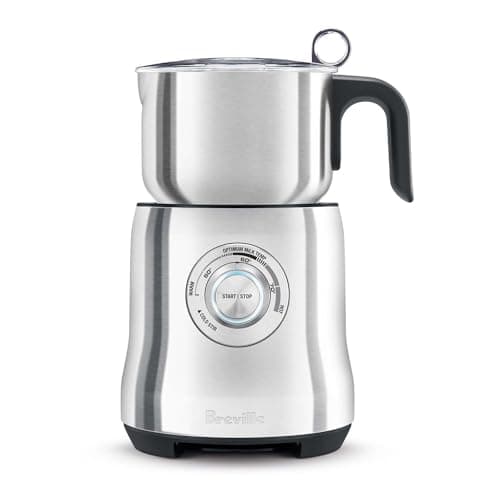 | Milk drinks without a steam wand or a second step | Best all-in-one | |
| 3 | 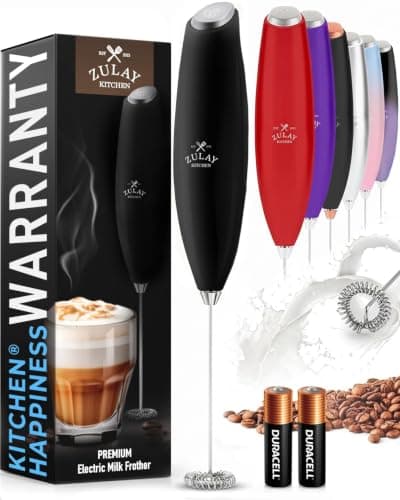 | Adding foam to coffee without spending much at all | Best value | |
| 4 | 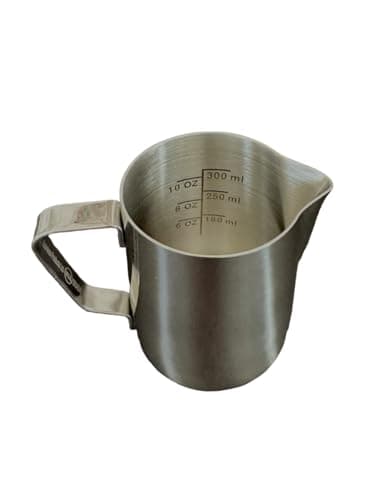 | Anyone with an espresso machine, texturing plant milk properly | Best if you have a steam wand | |
| 5 | 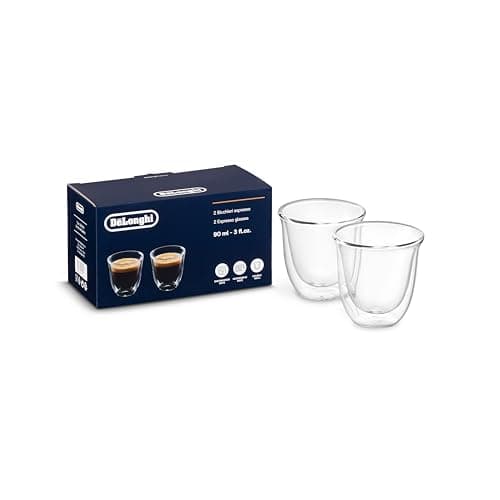 | Serving espresso, which is what it is for | Skip this - the glass is not the problem |
1. Top pick
Subminimal NanoFoamer
Mid tier · A handheld frother that forces milk through a fine screen to build real microfoam.
Forces milk through a fine screen, which builds microfoam where whisks only build bubbles.
Almost every handheld frother is a whisk. It spins, it drags air into the milk, and it produces bubbles - large ones, stiff ones, the kind that sit on top of a drink as a distinct layer.
The NanoFoamer works differently. An impeller drives milk through an interchangeable fine screen, breaking the air into very small bubbles distributed through the liquid rather than floating on it. That is what microfoam actually is, and it is what makes milk pourable and glossy instead of foamy.
The adjustment is genuinely useful. An impeller height adjuster moves in 0.4 mm steps and the screens come in different finenesses, so you can set the texture rather than accept whatever the device produces. Plant milks need that, because oat, almond and soy all behave differently.
It takes about thirty seconds from warm milk, and it is rated IPX-4, with later models at IPX-5. It does not heat the milk, so you warm it separately first.
Specification
- Mechanism
- Impeller driving milk through an interchangeable NanoScreen
- Adjustment
- Impeller height adjuster, 0.4 mm per click
- Screens
- Multiple fineness options
- Time
- About 30 seconds from warm milk
- Water resistance
- IPX-4; later models IPX-5
What it does well
- The only handheld device that produces genuine microfoam rather than bubbly foam
- Interchangeable screens let you set texture rather than accept one
- Works with plant milks, which stiff-foam frothers handle badly
Where it gives ground
- Does not heat the milk - you warm it separately first
- Best results still need barista-formulated plant milk
- More parts to rinse than a plain whisk frother
Skip it if
Skip it if you want one device that heats and froths. This does not heat at all, so it adds a step to every drink.
2. Best all-in-one
Breville Milk Cafe
Mid tier · A standalone induction milk frother with latte and cappuccino discs.
Heats and textures in one jug, with temperature control that matters more for plant milk.
The Milk Cafe heats and textures in the same vessel, which for most households is the practical answer. One jug, one button, warm textured milk.
Temperature control is the reason it suits plant milk specifically. Oat milk is considerably less forgiving of overheating than dairy - push it too far and the foam collapses and the taste turns thin and slightly cooked. Being able to set a temperature rather than let a device run until it stops is a real advantage.
It has enough capacity to make several drinks, which the handheld devices do not, and the jug lifts off for pouring.
It builds good foam rather than genuine microfoam. Latte art is not really achievable with it, and the texture is a step below what the NanoFoamer or a steam wand produces.
Specification
- Capacity
- 24 fl oz, up to 3 cups
- Temperature
- Cold stir to hot, up to 160 F
- Discs
- Latte and cappuccino frothing discs
- Power
- 500 W, induction heating
- Size
- 7.5 x 6.4 x 10.4 in
What it does well
- Frees a single-boiler machine from switching between brew and steam
- Genuine temperature selection rather than one hot setting
- Makes three drinks worth of milk at once
Where it gives ground
- Disc-frothed milk is not steam-textured milk, and latte art is off the table
- Another appliance on the counter
- Pointless if your machine already steams well
Skip it if
Skip it if you want to pour latte art. The foam is too stiff, and no setting changes that.
3. Best value
Zulay Handheld Milk Frother
Budget tier · A battery-powered handheld whisk that aerates milk in a jug or mug.
A handheld whisk that costs very little and does the job for cappuccino foam.
The Zulay is a battery-powered handheld whisk, and it is the honest budget answer. It costs a fraction of anything else here and it will put a decent head of foam on a cup of coffee.
For a cappuccino, where the foam sits on top as a distinct layer, that is exactly what is wanted and the more expensive devices are not obviously better at it.
It works on plant milks as well as dairy, in the sense that it will aerate anything. With a barista-formulated oat milk the result holds together reasonably well.
What it cannot do is microfoam. A spinning whisk drags in large bubbles, and large bubbles make foam rather than a glossy pourable texture. It is a foam-maker, and it does not pretend otherwise.
Specification
- Power
- 2 AA batteries (included); rechargeable models also sold
- Whisk
- Stainless steel
- Body
- Nylon
- Accessories
- Metal stand included
What it does well
- The cheapest way to get foam on a coffee, by a wide margin
- Works in any vessel, including the mug you are drinking from
- Cleans by rinsing the whisk under hot water and switching it on
Where it gives ground
- Aerates but does not heat - you warm the milk separately
- Produces bubbly foam, not steam-textured microfoam
- Latte art is not possible with it
Skip it if
Skip it if you drink flat whites. Whisk foam sits on top of the drink rather than integrating into it.
4. Best if you have a steam wand
Rattleware 12 oz Latte Art Pitcher
Entry tier · A 12 oz stainless steaming pitcher with a tapered spout, sized for single drinks.
The only thing you need if your machine already steams - no frother required.
If your machine has a steam wand, you do not need a frother. You need a pitcher with the right shape, and a technique adjusted for the milk you are using.
A 12 oz pitcher is the right size for one or two drinks. Too large and the milk is too shallow for the wand to create a proper whirlpool; too small and it climbs out. The sharp spout is what makes controlled pouring possible.
Plant milk changes the technique rather than the equipment. Oat milk stretches over a shorter window than dairy and collapses faster once overheated, so you aerate less and for less time, then stop earlier than instinct suggests.
This is the cheapest genuinely good answer on the page, provided you already own the machine. A steam wand plus a decent pitcher produces better milk than any frother here.
Specification
- Capacity
- 12 oz
- Material
- Stainless steel
- Spout
- Tapered, drip-resistant
- Suits
- Macchiato, cappuccino, small latte
What it does well
- Correct size for a single drink, which matters more than people expect
- Tapered spout is what makes a controlled pour possible
- Commercial-grade construction at a domestic price
Where it gives ground
- Too small for two drinks at once
- No etched graduations at this size
- Stainless conducts heat, so it gets hot in the hand
Skip it if
Skip it if you have no steam wand. It is a pitcher, not a frother - see milk pitchers.
5. Skip this - the glass is not the problem
De Longhi Double Wall Espresso Glasses
Entry tier · Double-walled borosilicate espresso glasses in the standard 3 oz demitasse size.
Included because milk problems get blamed on everything except the milk.
This is here to make a point rather than to be bought for this purpose. When plant-milk drinks disappoint, people replace equipment - the frother, the glasses, the machine - when the variable that actually matters is the milk itself.
Standard oat milk and barista oat milk are different products. Barista formulations add stabilizers and adjust the fat and protein content specifically so the milk holds foam and does not split in hot acidic coffee. The difference is not marginal; it is the whole result.
No device on this page will make plain oat milk foam like barista oat milk. The NanoFoamer gets closest and it still cannot manufacture proteins that are not there.
Buy good glassware because you like it. Do not buy it expecting it to fix your milk.
Specification
- Capacity
- 3 oz
- Material
- Borosilicate glass, double walled
- Sets
- Sold in twos and sixes
- Care
- Dishwasher safe
What it does well
- Double wall keeps a small shot hot far longer than a single-wall glass
- You can see the crema, which a ceramic cup hides
- No condensation and the outside stays touchable
Where it gives ground
- Glass is thin and these do break
- Double-walled glass is harder to warm through before pulling a shot
- 3 oz is right for espresso and too small for a cortado
Skip it if
Skip it as a milk fix. Buy a barista-formulated oat milk first, then judge your equipment - see espresso cups if glassware is what you actually want.
Buy barista milk before you buy a device
This is the single highest-return change and it costs a fraction of any frother. Barista-formulated oat milks exist because the standard product was never designed to be foamed or to meet hot acidic coffee.
The formulations adjust fat content, protein content and add stabilizers so the foam holds and the milk does not split. If you have been fighting your equipment, try the milk first - it will tell you whether you have an equipment problem at all.
Foam and microfoam are different things
Foam is large bubbles sitting on top of a drink as a distinct layer. Microfoam is very small bubbles distributed through the milk, giving a glossy, paint-like liquid that pours as one thing with the coffee.
A cappuccino wants foam. A flat white or a latte wants microfoam, and it is what latte art is poured with. Whisk-type frothers make foam; screen-based devices and steam wands make microfoam. That distinction decides which device you should buy far more than the price does.
Technique, if you have a steam wand
Step 1
Start colder
Milk straight from the fridge gives you a longer working window before it overheats.
Step 2
Aerate briefly
Introduce air in the first few seconds only. Plant milk stretches over a shorter window than dairy.
Step 3
Submerge and spin
Drop the tip below the surface and set up a whirlpool. This breaks the bubbles down into microfoam.
Step 4
Stop early
Plant milk collapses if pushed. The pitcher should be uncomfortably warm to hold, not too hot to touch.
Step 5
Swirl, do not tap
Tapping a plant-milk pitcher hard knocks the structure out. Swirl to fold the foam back into the liquid.