
The short answer
Fill the boiler with hot water to just below the safety valve, fill the basket level and do not tamp, assemble it tightly, and put it on medium heat with the lid open. When coffee starts gurgling and turning pale, take it off the heat and cool the base. The two mistakes that ruin moka coffee are too much heat and too fine a grind.
The method
Step 1
Fill the boiler with hot water
Fill to just below the safety valve - never above it. Starting with hot water shortens the time the coffee spends heating in the basket, which is the main cause of a stewed, bitter cup.
Step 2
Fill the basket level, and do not tamp
Fill the funnel basket to the top and level it off with a finger. Tamping a moka basket is the classic mistake: it is designed to work with loose grounds, and compacting them raises the pressure the pot has to fight.
Step 3
Assemble tightly, using a cloth
The boiler is already hot. Screw the top on firmly so the seal holds, and check that the gasket is seated and the filter plate is flat.
Step 4
Medium heat, lid open
Put it on medium - not high. High heat forces water through too quickly and scorches the coffee. Leave the lid open so you can see what is happening.
Step 5
Watch for the change
Coffee will rise slowly and darkly at first. When it lightens in color and starts to gurgle and sputter, the water is spent and everything after that is bitter.
Step 6
Take it off and cool the base
Remove it from the heat at the gurgle and run the base under cold water for a few seconds, or stand it on a wet cloth. That stops the extraction immediately rather than letting residual heat keep pushing.
The two rules that decide the cup
Medium heat, always. A moka pot is a pressure vessel driven by steam. Too much heat means water arrives too fast and too hot, which is exactly the bitter, burnt flavor the pot is blamed for.
Grind between espresso and filter. Too fine and the pot stalls, spits, or forces the safety valve; too coarse and the water runs through a loose bed and the cup is thin. See the grind size chart for where that sits.
Quick picks
The answer first. Tap any row to jump to the full reasoning for that pick.
| # | Product | Best for | Award | Price |
|---|---|---|---|---|
| 1 | 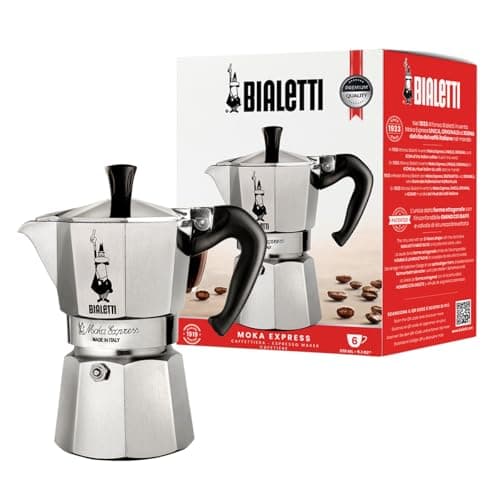 | Everyday stovetop coffee | The standard pot | |
| 2 | 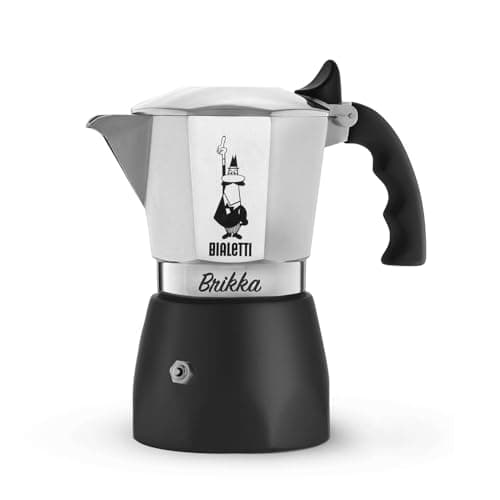 | A richer, heavier stovetop cup | If you want a crema layer | |
| 3 | 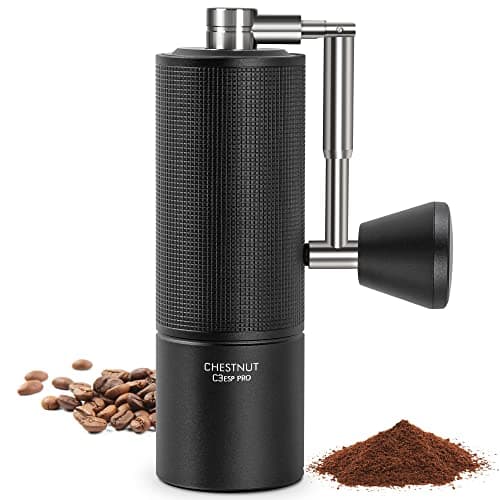 | Getting the grind right every time | The grinder that fixes most problems |
1. The standard pot
Bialetti Moka Express
Budget tier · The octagonal aluminum stovetop pot that defines the category.
The octagonal aluminum original, from 1 cup to 12.
The Moka Express is the pot every instruction on this page was written for: cast aluminum, octagonal, and sold in sizes from 1 cup to 12 - by far the widest range in the category.
Size is not a preference here, it is a constraint. A moka pot has to be filled properly to work, so a 6-cup pot cannot make two cups. Buy the size you drink.
There is no paper, no capsule and nothing electronic. Gaskets and filter plates are stocked everywhere and cost very little, which is why these pots last decades.
Cast aluminum will not work on induction without an adapter plate; Bialetti sells a stainless line for induction kitchens.
It produces little or no crema, and it is not espresso - see moka pot vs espresso machine.
Specification
- Material
- Cast aluminum (a stainless line is also sold)
- Sizes
- 1 to 12 cup
- Cooktops
- Gas and electric; needs an adapter plate for induction
What it does well
- Sizes from 1 to 12 cup - by far the widest range in the category
- No paper, no capsules, no electronics, and almost nothing to break
- Parts and gaskets are stocked everywhere and cost very little
Where it gives ground
- Aluminum will not work on an induction hob without a separate adapter
- You must fill the basket and boiler properly, so a big pot cannot make a small brew
- Produces little or no crema - it is not espresso
Skip it if
Skip it if your only cooktop is induction and you do not want an adapter. Buy the stainless version instead.
2. If you want a crema layer
Bialetti Brikka
Budget tier · A moka pot with a weighted pressure valve that builds a crema-like layer.
A weighted valve that holds pressure back until it releases in one go.
The Brikka adds a weighted pressure valve on the spout. Pressure builds under the weight and then releases, which produces a foam layer no ordinary moka pot makes.
The cup is noticeably richer and heavier than a standard Moka Express brew, which is the reason to buy one.
It comes in 2 cup (about 100 ml) and 4 cup (about 170 ml) only, so it does not scale for a household.
The valve is fussy: underfill the pot or use the wrong grind and it will not build pressure properly.
The foam is not espresso crema, whatever it looks like - see Bialetti Moka Express vs Brikka.
Specification
- Material
- Cast aluminum
- Sizes
- 2 cup (about 100 ml) and 4 cup (about 170 ml)
- Mechanism
- Weighted pressure valve
- Cooktops
- Gas and electric; a stainless-boiler Induction variant exists
What it does well
- The pressure valve gets closer to a crema than any other stovetop pot
- Richer, heavier cup than a standard Moka Express
- Same low running cost as any moka pot
Where it gives ground
- Only two sizes, so it does not scale for a household
- The valve is fussy - underfill it or use the wrong grind and it will not build pressure
- Still not espresso, whatever the crema layer suggests
Skip it if
Skip it if you want forgiving. The standard pot tolerates mistakes this one does not.
3. The grinder that fixes most problems
Timemore Chestnut C3
Manual tier · The budget hand grinder that made stainless conical burrs cheap.
38 mm burrs and about 23 microns per click - enough to find the moka setting and keep it.
Moka pots want a grind between espresso and filter: fine enough to resist the rising water, coarse enough not to choke it.
Pre-ground 'espresso' coffee is usually too fine and pre-ground filter is usually too coarse, which is why so many moka brews taste harsh or thin.
The C3's roughly 36 settings at about 23 microns per click make the correct setting findable and repeatable - count clicks from closed and write the number down.
Its 25 g capacity covers a typical 3-cup pot's basket in one load.
Its aluminum body and double-bearing axis mean it keeps that setting honest over years - see best grinders for moka pot.
Specification
- Burrs
- 38 mm S2C stainless conical, 55-58 HRC
- Settings
- Roughly 36, about 0.0233 mm per click
- Capacity
- 25 g
- Weight
- About 530 g
- Build
- Aluminum body, double-bearing axis, no plastic internals
What it does well
- Filter-grade grind quality at a genuinely low price
- Metal internals and double bearings, not a toy
- Small and light enough to travel with
Where it gives ground
- 38 mm burrs make an espresso dose slow work
- Espresso resolution is marginal
- 25 g capacity limits you to one brew at a time
Skip it if
Skip it if you already own a burr grinder. Any burr grinder with a repeatable setting does this job.
Why your moka coffee tastes bad
- Bitter and burnt: heat too high, or you left it on past the gurgle.
- Thin and sour: grind too coarse, or the basket was not full.
- Spitting and stalling: grind too fine, or the grounds were tamped.
- Metallic: a new aluminum pot needs a few sacrificial brews, and old gaskets need replacing.
- Weak, whatever you do: the pot is too large for the amount you want. A moka pot must be filled properly, so buy the size you actually drink.
Cleaning, and the soap argument
Rinse all three parts with hot water and dry them. Traditional advice is to avoid soap on aluminum pots, on the grounds that it strips the seasoning and leaves a residue the coffee picks up.
Whatever you do about soap, two things are not optional: never put an aluminum moka pot in a dishwasher, and replace the gasket when it hardens - a poor seal is the most common reason a pot stops building pressure.