The short answer
Four pieces: a burr grinder, a dripper, a gooseneck kettle and a scale. Buy the grinder first - it sets the ceiling on everything else - then the dripper and papers, then the kettle, then the scale. A hand grinder, a plastic V60, a preset electric gooseneck and a 0.1 g scale with a timer is a complete, genuinely good setup, and the plastic dripper is not the compromise in it.
What to look for in each piece
- Grinder: burrs, and a setting you can return to. This is the piece that decides how the coffee tastes. Blades are not an option - see burr grinder vs blade grinder.
- Dripper: a shape with widely stocked papers. V60 02 papers are the most available filter in the US; a dripper with proprietary filters is a running cost and a supply problem.
- Kettle: a gooseneck spout and some temperature control. Presets are enough; a hold function is the underrated part.
- Scale: 0.1 g resolution and a timer. Anything beyond that - flow rate, ratio display - is genuinely optional.
Buy in this order
1. The grinder. Pre-ground coffee stales within days because grinding multiplies the exposed surface area. A grinder is the only piece here that improves every brew you will ever make.
2. The dripper and papers. Cheap, and the piece that actually makes coffee. Start in plastic; upgrade to ceramic later if you want the object.
3. The kettle. You can start by pouring carefully from a normal kettle - the coffee will be worse, and you will understand why a gooseneck exists.
4. The scale. Last only because a kitchen scale you already own will do the job. If you own nothing, buy it second.
Quick picks
The answer first. Tap any row to jump to the full reasoning for that pick.
| # | Product | Best for | Award | Price |
|---|---|---|---|---|
| 1 | 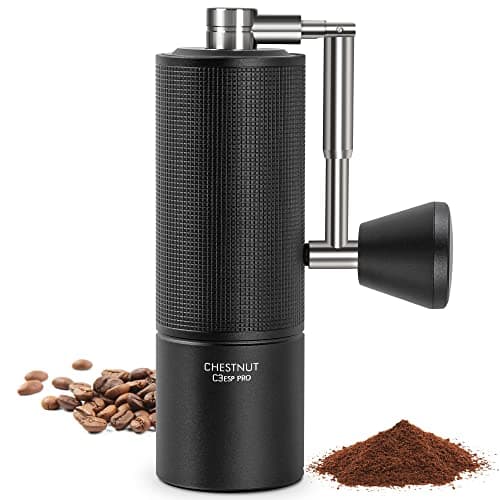 | The foundation of the whole kit | Buy this first | |
| 2 | 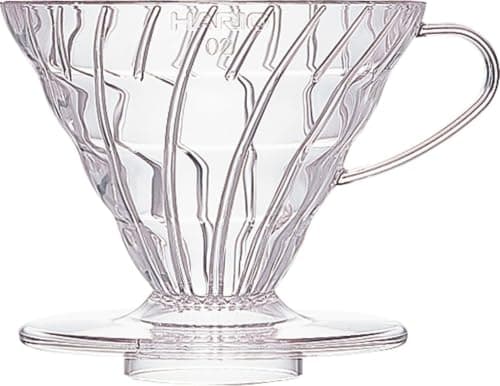 | Learning the method without breaking anything | The dripper to start with | |
| 3 | 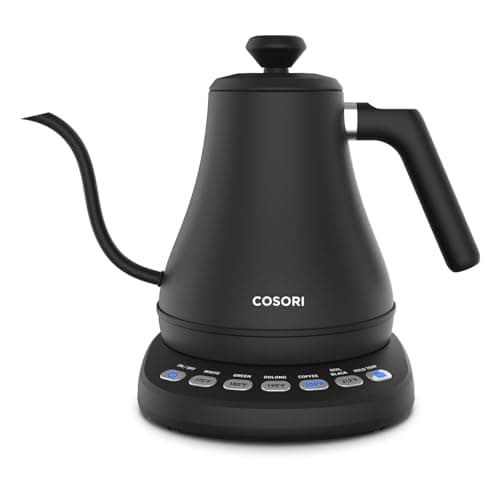 | Temperature and pour control without the premium | The kettle that does enough | |
| 4 | 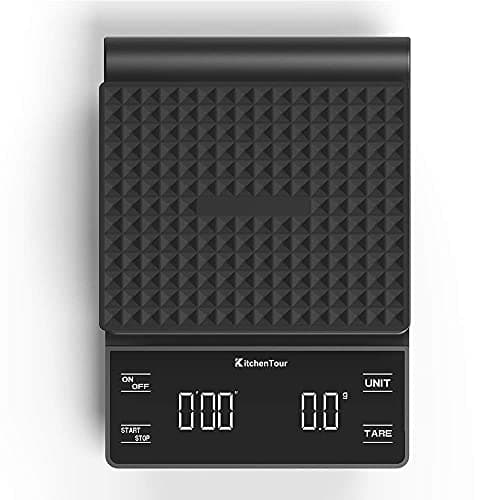 | Making a recipe repeatable | The cheapest piece that matters |
1. Buy this first
Timemore Chestnut C3
Manual tier · The budget hand grinder that made stainless conical burrs cheap.
38 mm stainless burrs and about 23 microns per click - the piece that decides the cup.
The grinder is the first purchase, not the dripper. An uneven grind extracts unevenly no matter how well you pour, and no dripper or kettle compensates for it.
The C3's 38 mm S2C stainless conical burrs at 55 to 58 HRC and roughly 36 settings - about 23 microns each - cover the whole filter range properly.
Its aluminum body, double-bearing axis and metal internals are why the burrs stay aligned, which is exactly what cheap electric grinders get wrong.
A 25 g capacity is one pour-over dose, and grinding it takes under a minute by hand.
Espresso is marginal here, and if several people make coffee in your house, an electric grinder is the better spend - see best grinders for beginners.
Specification
- Burrs
- 38 mm S2C stainless conical, 55-58 HRC
- Settings
- Roughly 36, about 0.0233 mm per click
- Capacity
- 25 g
- Weight
- About 530 g
- Build
- Aluminum body, double-bearing axis, no plastic internals
What it does well
- Filter-grade grind quality at a genuinely low price
- Metal internals and double bearings, not a toy
- Small and light enough to travel with
Where it gives ground
- 38 mm burrs make an espresso dose slow work
- Espresso resolution is marginal
- 25 g capacity limits you to one brew at a time
Skip it if
Skip it if you brew a carafe for a household. Hand grinding 60 g daily gets old.
2. The dripper to start with
Hario V60 Plastic Dripper 02
Budget tier · The same 60-degree cone geometry in plastic.
The same 60-degree cone as the ceramic, in plastic, for a fraction of it.
The plastic V60 02 has the same geometry that makes a V60 a V60: a 60-degree cone, inner spiral ribs and a single large hole that hands flow control to your pour.
Because plastic has no thermal mass to speak of, it does not need preheating the way ceramic does - one less step while you are learning.
It is effectively unbreakable, which matters for the brewer you will knock off a counter at least once.
It takes standard V60 02 papers, the most widely stocked filter size in the US - see Hario V60 01 vs 02 if you only ever brew one cup.
It feels cheap next to ceramic or glass and will stain over time. Neither affects the coffee.
Specification
- Geometry
- 60-degree cone, single large hole
- Ribs
- Inner spiral ribs
- Capacity
- 1-4 cups
- Material
- Plastic
What it does well
- Same brewing geometry as the ceramic for a fraction of the outlay
- Does not need preheating the way ceramic does
- Effectively unbreakable, so it travels
Where it gives ground
- Feels cheap next to ceramic or glass
- Plastic will stain over time
- No thermal mass, though that matters less than people claim
Skip it if
Skip it if you want an object you enjoy looking at. The ceramic 02 brews identically and looks better.
3. The kettle that does enough
COSORI Electric Gooseneck Kettle
Budget tier · A stainless gooseneck kettle with five temperature presets and a keep-warm hold.
Five presets, a 60-minute hold and all-stainless water contact.
A gooseneck matters because a pour-over is controlled by the stream: where it lands, how fast, how steadily. A normal kettle cannot do it.
The COSORI's presets - 170, 180, 195, 205 and 212 F - cover every recipe you will follow as a beginner, and the hold keeps the water there for up to 60 minutes while you weigh and grind.
Every water-contact surface is food-grade stainless: kettle, lid and spout. That is worth checking on anything cheaper.
Its 1200 W element boils 0.8 L in three to five minutes, which is the whole capacity you need for one or two brews.
Spout control is good rather than Stagg-good, and there is no brew timer - see Fellow Stagg EKG vs COSORI.
Specification
- Capacity
- 0.8 L
- Presets
- 170 / 180 / 195 / 205 / 212 F
- Hold
- Up to 60 minutes
- Power
- 1200 W; boils full in 3-5 minutes
- Contact surfaces
- Food-grade stainless kettle, lid and spout
What it does well
- Every water-contact surface is stainless, not plastic
- Presets cover the temperatures coffee and tea actually use
- A fraction of the Stagg outlay for most of the function
Where it gives ground
- Presets rather than a free temperature dial
- Spout control is good, not Stagg-good
- No brew timer
Skip it if
Skip it if the budget is tight - a stovetop gooseneck plus a thermometer costs less and pours well.
4. The cheapest piece that matters
KitchenTour Coffee Scale with Timer
Budget tier · A backlit coffee scale whose 0.1 g resolution applies only up to 500 g.
0.1 g resolution up to 500 g, a timer, and a waterproof pad.
A scale is what turns a good brew into a repeatable one. Without weighing, dose and water are guesses, and a guess cannot be adjusted deliberately.
This one reads 0.1 g from 0.3 to 500 g, which covers every pour-over dose and the water for a single brew, with a built-in timer for bloom and total time.
The backlit display reads clearly from above a dripper - less obvious a benefit than it sounds until you are pouring over one.
A waterproof non-slip silicone pad keeps it steady on a wet counter.
Resolution drops to 0.5 g above 500 g, and touch keys are less reliable with wet fingers than physical buttons - see best coffee scales under $50.
Specification
- Capacity
- 3000 g
- Resolution
- 0.1 g from 0.3-500 g; 0.5 g to 1000 g; 1 g to 3000 g
- Timer
- Built in
- Controls
- Touch-sensitive keys
- Display
- Backlit LCD
- Pad
- Waterproof non-slip silicone
What it does well
- 0.1 g covers every espresso dose and a typical single pour-over
- The backlit display is easy to read over a dripper
- The silicone pad keeps it from sliding on a wet counter
Where it gives ground
- Resolution drops to 0.5 g above 500 g, which matters for large batches
- Touch keys are less reliable with wet fingers than buttons
- No ratio or flow-rate features
Skip it if
Skip it if you already own any 0.1 g kitchen scale with a timer. Any of them works.
What the whole kit costs, honestly
These four pieces together land inside a $200 budget at the prices shown on the buy buttons above, with the hand grinder and the plastic dripper doing the heavy lifting on cost.
Swapping the preset kettle for a variable-temperature one, or the plastic dripper for ceramic, pushes the total above that - both are upgrades rather than requirements. Prices move; the buttons check the current ones.
Filters, and the running cost nobody mentions
Papers are the only consumable in this kit. V60 02 filters are the most widely stocked size in the US, sold in supermarkets as well as specialty shops, which is the practical reason to start with a V60 rather than a dripper with proprietary filters.
Bleached and unbleached both work. Unbleached papers benefit more from a rinse before brewing - pour hot water through the empty filter, discard it, then add coffee - which also preheats the dripper and the mug.
A reusable metal filter removes the running cost and changes the cup: more oils and fines come through, so it tastes closer to a French press. That is a preference rather than an upgrade - see best reusable coffee filters.
Where to put the money if you stretch the budget
The grinder, again. Moving from a budget hand grinder to an entry electric one buys speed and convenience; moving up the hand-grinder range buys larger burrs and finer adjustment. Both are real, and neither is urgent.
A variable-temperature kettle. The Fellow Stagg EKG's free dial and stopwatch are genuinely nicer to use than presets, and it costs about as much as the rest of this kit combined.
A ceramic dripper. The brewing is identical to plastic; you are buying an object you enjoy and slightly better heat retention once preheated - see Hario V60 plastic vs ceramic.
What to skip at the start
- A premium grinder. The jump from blade to any decent burr grinder is far larger than the jump from a good one to a great one.
- A second dripper. Learn one shape first; the difference between a V60 and a Kalita is smaller than the difference between your third and thirtieth brew.
- A distribution tool or fancy filters. Those solve problems you do not have yet.
- Pre-ground coffee 'to start with'. It undoes the grinder you just bought.
Keep a brew log from day one
Write down five numbers per brew: dose, grind setting, water weight, bloom time and total time, plus one word about the cup. It costs nothing and it is the difference between owning a kit and knowing how to use it.
Six brews of that log will teach you more about this equipment than six months of reading, because it turns vague impressions into a setting you can move deliberately in one direction.
Buy less coffee more often, too. A 250 g bag with a printed roast date, finished inside two weeks, beats a kilo that goes quiet in a cupboard - see best coffee canisters.